事前準備
CMakeをインストールする手順
- CMake公式サイトからダウンロード
CMake公式サイト にアクセスし、Windows向けのインストーラ(cmake-x.x.x-windows-x86_64.msi)をダウンロードしてください。 - インストール時の設定
インストール中、以下のオプションを選択してください:- "Add CMake to the system PATH for all users" を選択することで、自動的に環境変数に追加されます。
- CMakeのバージョン確認
インストール後、コマンドプロンプトを再起動して以下を実行します:bashコードをコピーするcmake --version正しいバージョンが表示されれば完了です。
Visual Studioで「C++によるデスクトップ開発」ワークロードをインストールする手順は以下の通りです。
手順 1: Visual Studio Communityのインストール
- Visual Studio Communityのダウンロード
- Visual Studioの公式サイト にアクセスして、Visual Studio Community Editionをダウンロードします。
- インストールの実行
- ダウンロードしたインストーラー(
vs_installer.exe)を実行します。
- ダウンロードしたインストーラー(
手順 2: 必要なワークロードの選択
- インストーラーを開く
- インストーラーが起動したら、インストーラーレイアウトに「ワークロード」というセクションが表示されます。
- 「C++によるデスクトップ開発」を選択
- 左側の「ワークロード」タブから「C++によるデスクトップ開発」オプションを選択します。このワークロードには、C++用のコンパイラやビルドツールが含まれています。
- インストール
- 「インストール」ボタンをクリックして、選択したワークロードをインストールします。インストールにはしばらく時間がかかる場合があります。
手順 3: インストール後の確認
- インストール完了後、Visual Studioを起動
- インストールが完了したら、Visual Studioを起動します。
- C++プロジェクトの作成確認
- Visual Studioで新しいC++プロジェクトを作成して、「C++によるデスクトップ開発」の機能が正常に動作しているか確認します。
C:\Users\yumat>cmake --version
cmake version 3.31.2

CMake suite maintained and supported by Kitware (kitware.com/cmake).
step1_最終ディレクトリ構成の確認
まずはプロジェクト内の最終ディレクトリ構成を確認します。
File Generator App/
│
├── frontend                 # Reactのプロジェクトフォルダ
│   ├── public
│   ├── src
│   │  ├── components
│   │  │  ├── ExportButton.js
│  │  │  └── StartButton.js
│   │  ├── App.js
│  │  └── index.js
│   └── package.json
├── backend
│   ├── RhinoCompute/                       # RhinoCompute サーバーのソースコード
│  │  └── src
│  │     └── rhino.compute
│  │         └── rhino.compute.csproj
│   ├── python
│   │  ├── my_compute_script
│   │  ├── rhino_compute_config
│  │  └── requirements.txt                # 不要?
│   ├── pip
│   └── requirements.txt
│
└── README.md                              # プロジェクトの概要
Step2_Reactアプリを作成
プロジェクトディレクトリを作成します
mkdir File Generator App
cd File Generator App
mkdir backend
Reactアプリを作成 frontendディレクトリ内で、npx create-react-appコマンドを実行して、Reactアプリを作成します。
npx create-react-app frontendreactとreact-domのバージョンを18.x.xに手動で変更します。
/frontend/package.jsonを修正します。
"dependencies": {
  "react": "^18.0.0",
  "react-dom": "^18.0.0",
  ...
}
Reactアプリのセットアップ frontendディレクトリに移動して、必要な依存関係をインストールします。
cd frontend
npm install
次に、バックエンドとの通信や開発に必要なライブラリをインストールします。
frontend/ に移動
Reactプロジェクトのフォルダに移動します。
Axios をインストール
フロントエンドとバックエンドの通信に使用するライブラリをインストールします
npm install axios確認package.jsonにAxiosが追加されていることを確認します
"dependencies": {
  "axios": "^<version>"
}
Reactアプリの中に2つの主要コンポーネントを作成します。
src/components/ フォルダを作成
コンポーネントを管理するためのフォルダを作ります
mkdir src/componentsExportButton.js の作成
import React from 'react';

const ExportButton = ({ onExportClick }) => {
  return <button onClick={onExportClick}>Export</button>;
};

export default ExportButton;
StartButton.js の作成
import React from 'react';

const StartButton = ({ onStartClick }) => {
  return <button onClick={onStartClick}>Start</button>;
};

export default StartButton;
App.js での統合
作成したコンポーネントをApp.jsに統合します。
src/App.js を編集
次のコードをApp.jsに書き込みます
import React, { useState } from 'react';

function App() {
  const [statusMessage, setStatusMessage] = useState("");

  const handleGenerate = async () => {
    try {
      setStatusMessage("Generating file...");
      const response = await fetch('http://127.0.0.1:5000/generate', {
        method: 'POST',
        headers: { 'Content-Type': 'application/json' },
        body: JSON.stringify({ param: 20 }) // ここで必要に応じて値を変更
      });
      const data = await response.json();
      if (response.ok) {
        setStatusMessage("File generated successfully!");
      } else {
        setStatusMessage(`Error: ${data.error}`);
      }
    } catch (error) {
      setStatusMessage(`Error: ${error.message}`);
    }
  };

  const handleDownload = () => {
    setStatusMessage("Downloading file...");
    window.location.href = 'http://127.0.0.1:5000/download';
  };

  return (
    <div style={{ padding: '20px', fontFamily: 'Arial, sans-serif' }}>
      <h1>File Generator</h1>
      <button onClick={handleGenerate} style={{ marginRight: '10px' }}>Generate File</button>
      <button onClick={handleDownload}>Download File</button>
      <p>{statusMessage}</p>
    </div>
  );
}

export default App;
フロントエンドの起動と動作確認
- フロントエンドの開発サーバーを起動
frontend/ディレクトリで以下のコマンドを実行します:npm start自動的にブラウザが開き、http://localhost:3000でアプリが表示されます。 - 動作確認
3.1 .NET 8 SDK のインストール
Rhino.Compute を動作させるためには、.NET 8 SDK をインストールする必要があります。
公式サイトにアクセス
.NET 8 SDK ダウンロードページ にアクセスしてください。
SDK のダウンロード
お使いの OS(Windows, macOS, Linux)に対応するインストーラをダウンロードしてください。
インストール
ダウンロードしたインストーラを実行し、画面の指示に従ってインストールを完了します。
動作確認
インストール後、ターミナルまたはコマンドプロンプトを開き、以下のコマンドを実行してインストールが成功していることを確認します。
dotnet --version正常にインストールされていれば、インストールしたバージョン番号(例: 8.0.x)が表示されます。
3.2 Rhino.Compute のダウンロード
次に、Rhino.Compute を GitHub からダウンロードし、プロジェクトフォルダに配置します。
backend フォルダに移動
ターミナルまたはコマンドプロンプトで、Rhino-Comp-Line-App プロジェクトフォルダ内の backend フォルダに移動します。
cd File Generator App/backendGitHub リポジトリをクローン
以下のコマンドを実行して、Rhino.Compute のリポジトリをクローンします。
git clone https://github.com/mcneel/compute.rhino3d.git RhinoComputerhino.compute.csprojを修正
以下はrhino.compute.csproj
<Project Sdk="Microsoft.NET.Sdk.Web">
  <PropertyGroup>
    <TargetFramework>net8.0</TargetFramework>
    <AssemblyName>rhino.compute</AssemblyName>
    <OutputType>Exe</OutputType>
    <RuntimeIdentifier>win-x64</RuntimeIdentifier>
    <SelfContained>True</SelfContained>
    <PublishTrimmed>False</PublishTrimmed>
    <AppendTargetFrameworkToOutputPath>false</AppendTargetFrameworkToOutputPath>
    <ApplicationIcon>favicon.ico</ApplicationIcon>
    <IsTransformWebConfigDisabled>true</IsTransformWebConfigDisabled>
    <AppendRuntimeIdentifierToOutputPath>false</AppendRuntimeIdentifierToOutputPath>
  </PropertyGroup>

  <PropertyGroup Condition="'$(Configuration)'=='Debug'">
    <OutputPath>..\bin\Debug\$(AssemblyName)</OutputPath>
    <DefineConstants>TRACE;RHINO_COMPUTE</DefineConstants>
  </PropertyGroup>

  <PropertyGroup Condition="'$(Configuration)'=='Release'">
    <OutputPath>..\bin\Release\$(AssemblyName)</OutputPath>
    <DefineConstants>TRACE;RHINO_COMPUTE</DefineConstants>
    <PublishDir>..\dist\$(AssemblyName)</PublishDir>
  </PropertyGroup>

  <ItemGroup>
    <PackageReference Include="Carter" Version="7.0.0" />
    <PackageReference Include="CommandLineParser" Version="2.9.1" />
    <PackageReference Include="Serilog.AspNetCore" Version="6.1.0" />
    <PackageReference Include="Serilog.Enrichers.Environment" Version="2.2.0" />
    <PackageReference Include="Serilog.Exceptions" Version="8.4.0" />
    <PackageReference Include="Serilog.Expressions" Version="3.4.1" />
    <PackageReference Include="Serilog.Settings.Configuration" Version="3.4.0" />
    <PackageReference Include="Serilog.Sinks.Async" Version="1.5.0" />
    <PackageReference Include="Serilog.Sinks.Console" Version="4.1.0" />
    <PackageReference Include="System.Net.Http" Version="4.3.4" />
    <!-- Microsoft.AspNetCore.App の参照を削除 -->
  </ItemGroup>
</Project>
3.3 必要なパッケージのインストール
Rhino.Compute が依存するパッケージをインストールします。
RhinoCompute フォルダに移動
CMDで backend/RhinoCompute/src/rhino.compute フォルダに移動します。
cd RhinoCompute/src/rhino.computeNuGet の実行
以下のコマンドを実行して、必要なパッケージをインストールします。
dotnet restore成功確認
パッケージが正常にインストールされている場合、Restore completed のようなメッセージが表示されます。
3.4 プロジェクトのビルドとサーバー起動
最後に、Rhino.Compute をビルドしてサーバーを起動します。
ビルドの実行
backend/RhinoCompute/src/rhino.compute フォルダ内で以下のコマンドを実行してプロジェクトをビルドします。
dotnet build成功すると、Build succeeded というメッセージが表示されます。
サーバーの起動
ビルド後、以下のコマンドで Rhino.Compute サーバーを起動します。
dotnet runサーバー動作確認
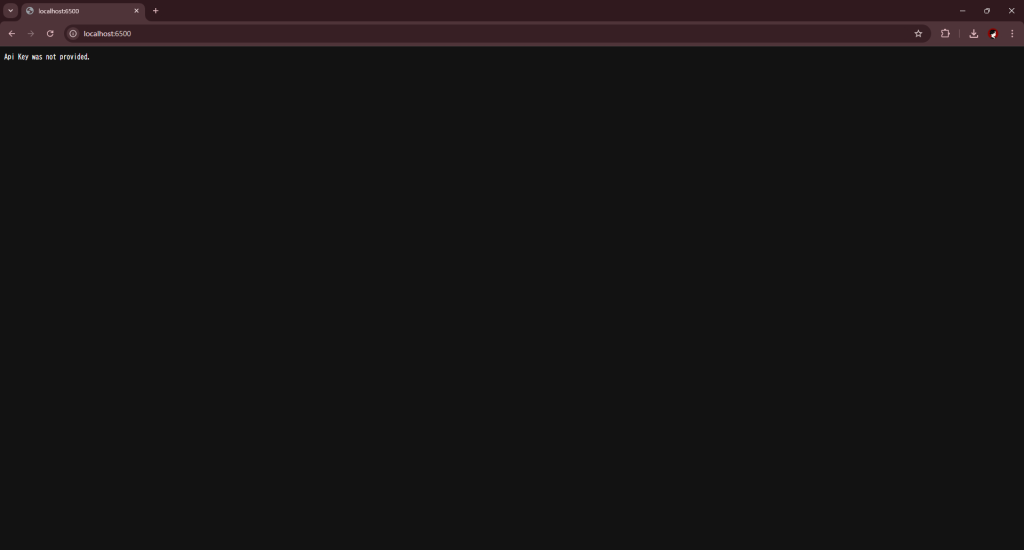
起動に成功すると、サーバーが http://localhost:6500 でリッスンしていることが表示されます。
ブラウザで http://localhost:6500 にアクセスし、Rhino.Compute が動作していることを確認します。
4. 必要なPythonライブラリのインストール
ディレクトリ: File Generator App/backend/
requirements.txt に以下の依存ライブラリを記述し、インストールします。
Flask==2.3.3
rhino3dm==8.9.0- ディレクトリ:
File Generator App/backend/
pip install -r requirements.txtmy_compute_script.py
from flask import Flask, request, jsonify, send_file
from flask_cors import CORS
import rhino3dm
import os

app = Flask(__name__)
CORS(app)  # appオブジェクトを作成後にCORSを設定

# ファイル生成用パス
BASE_DIR = os.path.dirname(os.path.abspath(__file__))
GENERATED_FILE_PATH = os.path.join(BASE_DIR, "generated_file.3dm")

@app.route('/generate', methods=['POST'])
def generate_file():
    try:
        data = request.get_json()
        param = data.get('param', 10)  # パラメータ(例: 線の長さ)

        # Rhinoファイル生成
        model = rhino3dm.File3dm()
        start_point = rhino3dm.Point3d(0, 0, 0)
        end_point = rhino3dm.Point3d(param, 0, 0)
        model.Objects.AddLine(start_point, end_point)

        # ファイルを保存
        model.Write(GENERATED_FILE_PATH)
        return jsonify({"message": "File generated successfully", "file": GENERATED_FILE_PATH})
    except Exception as e:
        return jsonify({"error": f"An error occurred: {str(e)}"}), 500

@app.route('/download', methods=['GET'])
def download_file():
    try:
        if os.path.exists(GENERATED_FILE_PATH):
            return send_file(GENERATED_FILE_PATH, as_attachment=True)
        else:
            return jsonify({"error": "File not found"}), 404
    except Exception as e:
        return jsonify({"error": f"An error occurred: {str(e)}"}), 500

if __name__ == '__main__':
    app.run(debug=True)
rhino_compute_config.py
from compute_rhino3d import Util

def initialize_rhino_compute():
    Util.url = "http://localhost:6500/"  # ローカルのポートを設定
コードの解説
frontend:ExportButton.js
/frontend/rhino-compute-line/src/components/ExportButton.js
import React from 'react';

const ExportButton = ({ onExportClick }) => {
  return <button onClick={onExportClick}>Export</button>;
};

export default ExportButton;
frontend:StartButton.js
/frontend/rhino-compute-line/src/components/StartButton.js
import React from 'react';

const StartButton = ({ onStartClick }) => {
  return <button onClick={onStartClick}>Start</button>;
};

export default StartButton;
frontend:App.js
/frontend/rhino-compute-line/src/App.js
import React from 'react';

function App() {
  // Exportボタンが押されたときに実行される関数
  const handleExport = async () => {
    try {
      const response = await fetch("http://127.0.0.1:5000/download", {
        method: "GET",
      });

      if (!response.ok) {
        throw new Error("Failed to download file");
      }

      const blob = await response.blob();
      const link = document.createElement("a");
      link.href = URL.createObjectURL(blob);
      link.download = "generated_file.3dm";
      link.click();
    } catch (error) {
      console.error("Error during export:", error);
      alert("Error during export");
    }
  };


  return (
    <div>
      <h1>Rhino Compute Web App</h1>
      <button onClick={handleExport}>Export</button>
    </div>
  );
}

export default App;
backend:my_compute_script.py
backend/python/my_compute_script.py
import os
import rhino3dm
from flask import Flask, request, jsonify, send_file
from flask_cors import CORS
import json

app = Flask(__name__)
CORS(app)  # CORSを有効にする

@app.route('/')
def home():
    return 'Welcome to the Rhino Compute Server!'

@app.route('/generate', methods=['POST'])
def generate_data():
    try:
        # JSONデータの取得
        data = request.get_json()
        param = data.get('param', 10)  # 例えば、paramの値を取得

        # Rhino3dmを使って3dmファイルを作成
        model = rhino3dm.File3dm()

        # 任意の3Dデータを生成(例: 線を作成)
        start_point = rhino3dm.Point3d(0, 0, 0)
        end_point = rhino3dm.Point3d(param, param, param)

        # Lineオブジェクトを作成(この行は不要になります)
        # line = rhino3dm.Line(start_point, end_point)  # 修正

        # ファイルにオブジェクトを追加
        # AddLine() は開始点と終了点の2つの Point3d を受け取ります
        model.Objects.AddLine(start_point, end_point)

        # 3dmファイルを保存
        file_path = os.path.join(os.getcwd(), 'generated_file.3dm')
        model.Write(file_path)

        # ファイル生成成功のレスポンス
        return jsonify({'message': 'File generated successfully', 'file': file_path}), 200

    except Exception as e:
        print(f"Error during file generation: {e}")  # エラーメッセージを詳細に出力
        return jsonify({'error': f'Error during file generation: {str(e)}'}), 500


@app.route('/download', methods=['GET'])
def download_file():
    file_path = os.path.join(os.getcwd(), 'generated_file.3dm')
    if os.path.exists(file_path):
        try:
            return send_file(file_path, as_attachment=True, download_name='generated_file.3dm')
        except Exception as e:
            print(f"Error during file sending: {e}")
            return jsonify({'error': 'Error during file sending'}), 500
    else:
        print(f"File not found at {file_path}")
        return jsonify({'error': 'File not found'}), 404


if __name__ == '__main__':
    app.run(debug=True)
backend:rhino_compute_config.py
backend/python/rhino_compute_config.py
from compute_rhino3d import Util

def initialize_rhino_compute():
    Util.url = "http://localhost:6500/"  # ローカルのポートを設定
backend:requirements.txt
backend/python/requirements.txt
rhino3dm
compute-rhino3d